

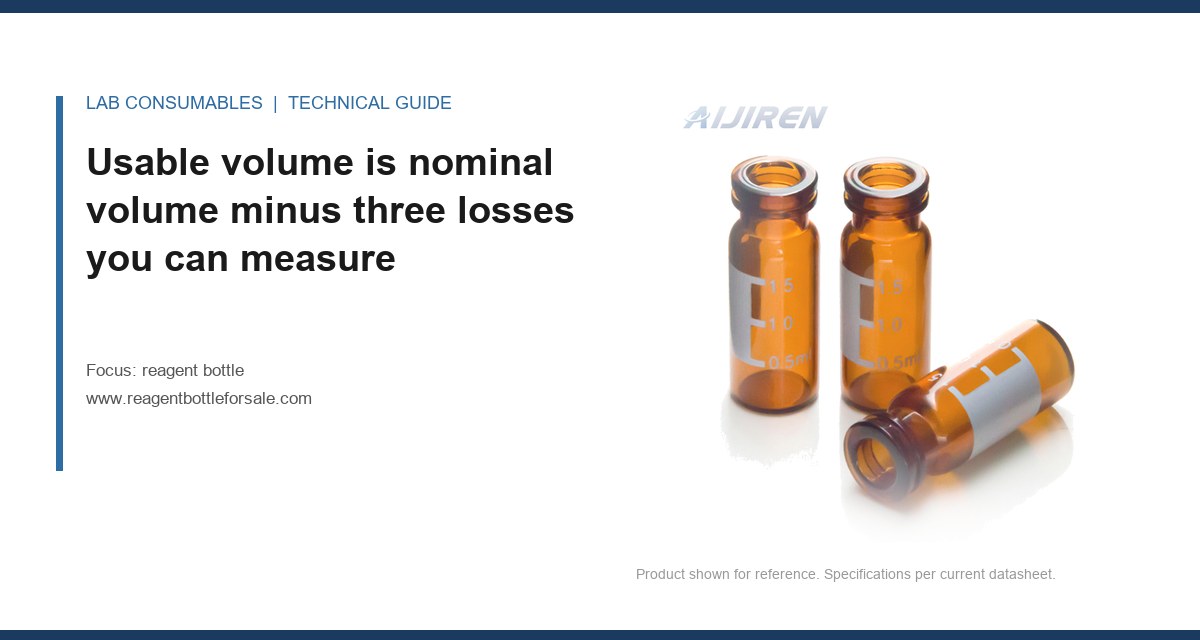
A 2 mL autosampler vial with a 300 µL insert was sized for a 40-injection run and ran dry at injection 31. The method consumed 8 µL per injection, the autosampler pulled from 6 mm above the insert bottom, and nobody had subtracted the 32 µL of dead volume in the taper. The run failed on a Sunday. The fix took ten minutes of arithmetic and a different insert. That is the entire problem this guide solves: reagent bottle capacity and puncture life for a given injection count is a two-variable equation, and most labs solve only one of them.
I have sized a lot of bottles against a lot of methods, and the failure mode is almost never the bottle. It is the gap between the nominal volume printed on the label and the usable volume that reaches the needle. Below is how I work that number, plus the puncture arithmetic that decides whether the cap septum survives the run.
Nominal capacity on a reagent bottle is the brim-full number. For a 500 mL borosilicate bottle, that is measured to the lip. What the autosampler sees is smaller by three quantities:
- Fill headspace. Never fill above 80 to 85% of nominal if the bottle is capped and will be aspirated. A 500 mL bottle holds about 400 mL of usable liquid at 80%. Above that, you risk wicking into the cap and droplet formation on the septum underside.
- Dead volume. The liquid below the lowest point the needle can reach. In a flat-bottom bottle with a straight needle, that is 3 to 8 mL depending on the bottle base radius. In a tapered insert vial, it is 20 to 40 µL. In a 500 µL insert, expect 8 to 12 µL.
- Reserve. The volume you must leave because the needle should never touch the bottom. I use 5 mm minimum clearance, which is 1.5 to 3 mL in a 500 mL bottle and 4 to 6 µL in a 300 µL insert.
Usable volume = nominal × 0.80 − dead volume − reserve. For a 500 mL bottle with a 5 mL dead volume and a 3 mL reserve, that is 400 − 5 − 3 = 392 mL. That is the number to divide by your per-injection draw.
Worked example: 500 mL bottle, 8 µL injection, 1 mL flush
Per-injection consumption is not the injection volume. It is injection volume plus flush volume plus any loop overfill. A 10 µL loop filled with 8 µL of sample plus a 1 mL needle flush consumes 1.008 mL per injection. From 392 mL usable, that is 388 injections. If your method runs 400 injections per bottle, you are short by 12. You will find out at injection 389.
This is where the HPLC autosampler vial size decision and the reagent bottle size decision start to look like the same calculation at different scales. They are. The arithmetic does not change; only the dead volume constant does.
Dead volume is a geometry constant, not a guess
I see dead volume estimated from a catalog table more often than it is measured. Measure it. Fill the container with a known volume, run the autosampler until it alarms on no-liquid, and subtract the delivered volume from the starting volume. That number is your dead volume for that bottle-needle combination, and it will not match the catalog within 30%.
For planning purposes, these are the values I use when I do not have time to measure:
| Container | Nominal volume | Typical dead volume | Reserve (5 mm) | Usable at 80% fill |
|---|---|---|---|---|
| Wide-mouth reagent bottle | 500 mL | 5–8 mL | 3 mL | 389–392 mL |
| Narrow-mouth reagent bottle | 250 mL | 3–5 mL | 2 mL | 193–195 mL |
| Autosampler vial, flat bottom | 2 mL | 150–250 µL | 30 µL | 1,320–1,420 µL |
| Autosampler vial, tapered insert | 300 µL | 20–32 µL | 6 µL | 202–214 µL |
| Micro-insert | 150 µL | 8–12 µL | 4 µL | 104–108 µL |
The 300 µL insert in the opening case had 32 µL of dead volume and 6 µL of reserve. At 80% fill that is 202 µL usable. The method drew 8 µL per injection with no flush, so 25 injections. The lab had planned 40. That is the whole failure: 202 ÷ 8 = 25.25.
Injection count drives the bottle, not the other way around
Most labs pick a bottle size off the shelf and then discover the injection count does not fit. Do it in the other order. Start with the injection count, multiply by per-injection consumption, add dead volume and reserve, divide by 0.80. That is your nominal bottle size. Round up to the next standard size.
The sizing formula, written out
Nominal volume ≥ (injections × per-injection consumption + dead volume + reserve) ÷ 0.80.
Run it for a 96-injection run at 20 µL draw with a 500 µL flush on a 2 mL autosampler vial: (96 × 0.52 mL + 0.20 mL + 0.03 mL) ÷ 0.80 = (49.92 + 0.23) ÷ 0.80 = 62.7 mL. That is not a 2 mL vial. That is a 100 mL bottle feeding the autosampler from a transfer line, or a 60 mL bottle with a septum cap. The lab that ran the 2 mL vial for 96 injections was refilling mid-run, which is a different problem.
If you are running a long sequence, the reagent bottle should be a reservoir, not a sample container. The transfer line from reservoir to needle adds its own dead volume (typically 0.5 to 2 mL for 1/16 in. OD PTFE tubing at 0.030 in. ID), and that must be flushed before the first injection.
Puncture life is a septum arithmetic problem, and the numbers are smaller than you think
A standard silicone/PTFE septum in a 9 mm screw cap is rated for 50 to 100 punctures before coring risk becomes real. A pre-slit septum is rated higher on paper, but the slit is a leak path, not a puncture path, and I have seen pre-slit septa leak at 20 psi headspace pressure after 30 punctures because the slit does not reseal against pressure, only against diffusion.
The puncture arithmetic is simple: punctures per injection × injections per run × runs per septum = total punctures. If your autosampler punctures the septum once per injection and you run 96 injections per sequence, that is 96 punctures per run. A 50-puncture septum is done before the run ends. You need a septum rated for at least 150 punctures to have margin, or you need to change septa mid-run, which nobody does.
Needle gauge changes the arithmetic
A 22-gauge needle has an outside diameter of 0.028 in. (0.71 mm). A 26-gauge needle is 0.018 in. (0.46 mm). The puncture hole area scales with the square of the diameter, so a 22-gauge needle makes a hole 2.4 times the area of a 26-gauge hole. That matters for two reasons: coring risk (larger needle, more material displaced) and reseal time (larger hole, slower reseal).
For a 50-puncture septum, a 22-gauge needle is at the edge. For a 26-gauge needle, the same septum will comfortably take 100 punctures. If you are running a long sequence with a 22-gauge needle, either move to a 26-gauge needle or move to a septum rated for 100+ punctures. The Agilent consumables catalog lists puncture ratings per septum part number, and it is worth checking against your needle gauge before you buy a case.
The septum is a wear part, and the wear rate is measurable
I track septum life by puncture count, not by calendar. A septum that has seen 40 punctures with a 26-gauge needle is fine. The same septum with 40 punctures from a 22-gauge needle is at 80% of its rated life. The difference is the hole area, not the number of punctures.
Two field cases make this concrete.
Case 1: the ghost peak that was a coring event
A lab running a 200-injection sequence on a single 2 mL vial saw a new peak at 6.2 minutes starting at injection 140. The peak was silicone, confirmed by GC-MS. The septum had been punctured 140 times with a 22-gauge needle, and the septum was rated for 50 punctures. The fix was a septum rated for 200 punctures and a switch to a 26-gauge needle. The peak disappeared at injection 1 of the next run. The measurement that identified it was the puncture count, not the chromatogram.
Case 2: the volume that was not the volume
A different lab sized a 250 mL bottle for 300 injections at 0.5 mL per injection. The arithmetic said 300 × 0.5 = 150 mL, plus 5 mL dead volume, plus 2 mL reserve, divided by 0.80 = 196 mL. A 250 mL bottle should have worked. It ran dry at injection 240. The measurement that identified the problem was the actual per-injection consumption: the method used a 1 mL flush, not a 0.5 mL flush, so real consumption was 1.0 mL per injection, not 0.5. The corrected arithmetic gave 375 mL, which required a 500 mL bottle. The lesson is to measure per-injection consumption from the autosampler log, not from the method header.
A decision checklist for sizing in under five minutes
When I size a bottle for a new method, I run this checklist in order. It takes less time than reading a catalog page.
- Count injections per run and runs per bottle. Multiply them. That is total injections per bottle.
- Measure per-injection consumption from the autosampler’s own log, not the method header. Include flush, loop overfill, and any needle wash.
- Measure dead volume for the specific bottle and needle combination by running to no-liquid once.
- Add 5 mm reserve (3 mL for a 500 mL bottle, 6 µL for a 300 µL insert).
- Divide by 0.80 to get nominal volume. Round up to the next standard size.
- Count punctures per septum from the same injection count, multiplied by punctures per injection (usually 1).
- Check septum rating against needle gauge. 22-gauge needle: 50-puncture septum is marginal. 26-gauge needle: 100-puncture septum is comfortable.
- Verify cap torque and closure. A 9 mm screw cap on a 2 mL vial should be torqued to 0.8 to 1.2 in-lb. A 24 mm cap on a 100 mL bottle to 8 to 12 in-lb. Under-torque is a leak path; over-torque crushes the septum and shortens puncture life.
If the checklist gives a bottle size larger than you want to handle, the answer is not a smaller bottle. It is a reservoir with a transfer line, or a mid-run refill procedure with a documented dead-volume flush. The Thermo Fisher sample handling documentation covers transfer-line dead volume for their autosamplers, and the numbers are worth checking against your setup.
Where the arithmetic breaks: three failure modes I have dealt with
The sizing formula is simple. The failures come from inputs that are wrong, and there are three that recur.
Failure 1: the flush volume is not in the method header
Autosamplers flush the needle between injections, and the flush volume is often set in a separate configuration screen, not the method. A 1 mL flush on a 500 µL draw triples the per-injection consumption. Check the autosampler configuration, not the method. This is the failure in Case 2 above, and it is the most common one I see.
Failure 2: the dead volume is measured on a different bottle
Dead volume depends on the bottle base geometry, the needle length, and the needle offset from center. A dead volume measured on a flat-bottom 500 mL bottle does not apply to a tapered 250 mL bottle. Measure on the actual bottle, or use the table above and add 30% margin.
Failure 3: the septum rating is a laboratory number, not a field number
Septum puncture ratings are measured under clean conditions with a fresh needle. In the field, a needle that has been through 500 injections has a burr on the bevel, and that burr cores the septum faster. A 50-puncture septum with a worn needle behaves like a 30-puncture septum. If you are running long sequences, replace the needle on the same schedule as the septum, or track needle injections and replace at 500.
Torque, cap size, and the closure that actually holds
Puncture life is not just the septum. It is the septum plus the cap plus the torque. A 9 mm screw cap torqued to 0.8 in-lb holds a silicone/PTFE septum against 30 psi headspace pressure. The same cap torqued to 1.5 in-lb crushes the septum, and the puncture hole does not reseal because the septum is under compression. I have seen a lab torque to “hand tight” and get 2.5 in-lb on a 9 mm cap, which is over-torque by a factor of two.
Use a torque wrench or a calibrated cap tightener. The numbers for common closures:
| Closure | Cap size | Target torque | Over-torque symptom |
|---|---|---|---|
| Screw cap, autosampler vial | 9 mm | 0.8–1.2 in-lb | Septum compression, poor reseal |
| Screw cap, 2 mL vial | 13 mm | 2–3 in-lb | Septum extrusion, leak at 20 psi |
| Screw cap, reagent bottle | 24 mm | 8–12 in-lb | Cap cracking, thread stripping |
| Screw cap, wide-mouth bottle | 38 mm | 15–20 in-lb | Gasket deformation, leak path |
The EPA SW-846 methods do not specify torque, but they do specify that the container must not leak under the transport conditions in the method, and torque is how you meet that. The Restek technical library has a useful note on septum selection for headspace and purge-and-trap that covers the reseal behavior under pressure.
What I recommend for the three most common injection counts
For a 50-injection run at 10 µL draw with a 500 µL flush: a 2 mL autosampler vial with a 300 µL insert, filled to 250 µL, with a 26-gauge needle and a 100-puncture septum. Usable volume is 202 µL, per-injection consumption is 0.51 mL, so you need 25.5 mL, which does not fit. Use a 10 mL bottle with a septum cap, or run 25 injections per vial and change mid-run. The sample vial pricing pages are useful for comparing the cost of changing vials mid-run against the cost of a larger bottle.
For a 200-injection run at 20 µL draw with a 1 mL flush: per-injection consumption is 1.02 mL, so 204 mL plus 5 mL dead volume plus 3 mL reserve is 212 mL, divided by 0.80 is 265 mL. A 500 mL bottle is the safe choice. Use a 26-gauge needle and a 200-puncture septum, and check the septum at injection 100.
For a 1,000-injection run at 5 µL draw with a 500 µL flush: per-injection consumption is 0.505 mL, so 505 mL plus 5 mL plus 3 mL is 513 mL, divided by 0.80 is 641 mL. Use a 1 L bottle with a transfer line, or two 500 mL bottles with a documented switchover at injection 500. The chromatography products catalog has the transfer-line fittings and the larger bottle sizes.
The decision rule
Size the bottle from the injection count, not from the shelf. Measure per-injection consumption from the autosampler log (including flush), measure dead volume on the actual bottle, add 5 mm reserve, divide by 0.80, and round up. Then count punctures: one per injection, checked against the septum rating for your needle gauge, with a 50% margin for needle wear. If the arithmetic gives a bottle larger than you want, the answer is a reservoir or a documented mid-run change, not a smaller bottle. The 300 µL insert that ran dry at injection 31 was not a bad insert. It was 202 µL of usable volume against a method that needed 320.
References & further reading
Related resources from our lab consumables network:
- Reagent Bottle at reagentbottleforsale.com
- Hplc Autosampler Vial at hplcautosamplervials.com
- Sample Vial at samplevialprice.com
- Chromatography Products at chromatographyselling.com
External references and standards: