

I once watched a postdoc ruin a month of method development because he stored his mobile phase in a soda-lime bottle he’d grabbed from the glassware cabinet. Two weeks in, sodium leached past the borosilicate threshold, the baseline drifted, and nobody could figure out why the peak shape on his carboxylic acid analytes had gone sideways. The fix took ten seconds once we found it. The diagnosis took three days. That story is the reason I take bottle selection seriously, and it’s why this guide exists.
Reagent bottles look like commodity items. They aren’t. Between glass chemistry, closure design, graduation accuracy, and the way a bottle interacts with your autosampler and your fume hood, there are maybe a dozen decisions that matter. Get them wrong and you’ll spend your time chasing ghosts in your chromatograms. Get them right and the bottle disappears into the background, which is exactly what you want.
The chemistry of the contents drives everything else. Before you look at a catalog, write down the pH, the solvent system, the storage temperature, and the light sensitivity of whatever you’re putting inside. Those four parameters eliminate about 80% of the catalog immediately.
Glass types and what they tolerate
Borosilicate glass (Type I, USP) is the default for anything analytical. It’s about 81% SiO2 with boron oxide replacing the sodium that causes leaching in soda-lime. Type I glass hydrolytic resistance is rated at less than 0.1 mL of 0.01 M HCl consumed per 10 g of glass under USP <660> testing. That’s the number that matters for trace analysis. Soda-lime (Type III) is fine for buffer prep and general reagents at neutral pH, but I wouldn’t put a 0.1 M sodium hydroxide solution in it for long-term storage. The alkali attacks the silica network and you get both contamination and, eventually, a hazy bottle that fails visual inspection.
For hydrofluoric acid, high-alkali solutions above pH 12, or anything where you’re chasing sub-ppb sodium, use PTFE or PFA. Fluoropolymer bottles cost five to ten times what glass does, but they’re inert to almost everything and they don’t shatter. I keep a small set of 250 mL PFA bottles specifically for trace metals work and for storing the 5% nitric acid used to rinse ICP-MS sample lines.
Amber versus clear
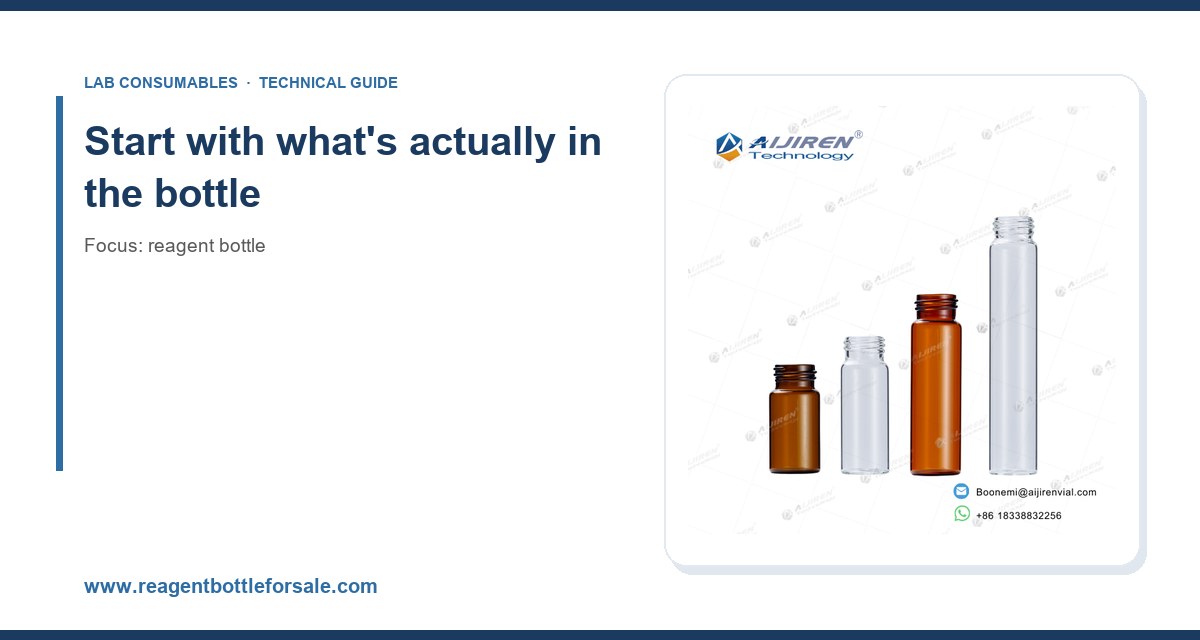
Amber glass blocks wavelengths below about 500 nm, which protects photosensitive compounds like vitamins, certain antibiotics, and a long list of dye standards. If your analyte has an absorption band in the visible region, go amber. If you’re storing HPLC mobile phase, clear is fine and it lets you see particulates. Don’t assume amber means “protected” for everything; it does nothing for UV-sensitive compounds that absorb above 500 nm, and it does nothing for oxidation.
Plastic: when it’s the right answer
HDPE and PP bottles have their place. They’re unbreakable, cheap, and light. They’re also slightly permeable to oxygen and to some solvents, and they can leach oligomers into your contents. For short-term storage of aqueous buffers, they’re fine. For a 0.1% TFA mobile phase that’s going to sit on a shelf for six weeks, use glass. I’ve seen HDPE bottles impart a small but measurable peak at the solvent front in gradient runs, and tracing that back to the bottle is the kind of thing that costs you a week.
Closure design is where most people underthink
The cap and the pour ring are the parts that fail. I’ve had more problems with closures than with glass bodies, and I’ve had a lot of problems with glass bodies.
GPI threads and why they matter
Glass Packaging Institute (GPI) thread finishes are the de facto standard in North America. A GPI 24-400 finish means a 24 mm nominal diameter with a 400-style thread profile, and it’s the most common size for 250 mL and 500 mL reagent bottles. GPI 18-400 is typical for 100 mL and smaller. If you’re buying bottles and caps separately, match the GPI number exactly. A “24 mm” cap from one vendor may not seal on a “24 mm” bottle from another if one is GPI 24-400 and the other is a DIN 24 thread. I’ve watched people fight leaks for an afternoon because of this.
ISO 4796 covers laboratory glassware bottle dimensions and is worth knowing if you’re sourcing internationally. European suppliers often ship DIN-threaded bottles, which are not interchangeable with GPI. If you’re mixing suppliers, standardize on one thread system and stick with it.
Liner materials
The liner is the membrane between your contents and the outside world, and it’s the weakest link in most closures. Here’s how I think about the common options:
- PTFE-faced silicone: the workhorse. Good chemical resistance, good reseal after puncture, usable from -40 °C to about 200 °C. This is what I use for most HPLC mobile phase bottles.
- PTFE-faced rubber: similar but with better gas-tightness and less permeability. Slightly harder to pierce repeatedly.
- Polyethylene (PE) cone liners: fine for aqueous solutions and short-term storage, but they don’t reseal well after puncture and they’re not solvent-resistant.
- Aluminum foil: good barrier, no reseal, gets destroyed by repeated piercing. Use for single-use or for shipping.
- Bare PTFE: excellent chemical resistance, but it cold-flows under torque, so it needs a higher torque to seal reliably.
For anything that’s going to be pierced by a solvent inlet line or a sampling needle, use a PTFE-faced silicone or PTFE-faced rubber liner. For solvent delivery lines specifically, I like a two-port cap with one port for the inlet line and one for the vent, both with PTFE-faced septa. It cuts down on evaporation and keeps the headspace from equilibrating with lab air.
Torque values that actually work
Hand-tight is not a specification. For a GPI 24-400 cap with a PTFE-faced silicone liner, I torque to 15 to 20 inch-pounds (1.7 to 2.3 N·m). Below 12 inch-pounds you’ll get leaks under vacuum or when the bottle is inverted. Above 25 inch-pounds you’ll cold-flow the liner and it’ll be harder to remove next time, and on some caps you’ll crack the plastic. For GPI 18-400, drop to 8 to 12 inch-pounds. If you don’t have a torque wrench, get one. A $40 torque screwdriver pays for itself the first time you avoid a solvent leak in a shared hood.
Graduations, accuracy, and the “is it really 500 mL” question
Reagent bottle graduations are approximate. They’re there so you can eyeball a volume, not so you can dispense to 0.1 mL. Typical accuracy on a 500 mL graduated bottle is ±5%, which is 25 mL. If you need better than that, use a graduated cylinder or a volumetric flask. I’ve seen people try to make up mobile phase directly in a bottle using the graduation marks and then wonder why their retention times drift between batches. The bottle isn’t the problem; the assumption is.
That said, if you’re making up a 20% methanol / 80% water mobile phase, the bottle graduation is fine. If you’re making up a 0.05 M phosphate buffer where the exact molarity matters for a validated method, weigh it out. The bottle is a container, not a measuring device.
Working with autosamplers and chromatography systems
This is where bottle selection intersects with the rest of your workflow, and where a lot of people buy the wrong thing. The bottle on your bench and the vial in your autosampler are different components with different requirements, but they need to be compatible with the same solvent delivery system.
If you’re running HPLC, the mobile phase bottle is the upstream end of a chain that includes the solvent inlet filter, the degasser, the pump, the injector, the column, and the HPLC autosampler vial. Each link has its own specifications. The bottle needs a cap that accepts a solvent inlet line (typically 1/8 inch OD PTFE tubing) without leaking, and it needs to be positioned so the inlet filter sits about 5 mm off the bottom. If your bottle is too tall for the solvent tray, you’ll either run it outside the tray (bad for evaporation and spill risk) or swap to a shorter bottle. Standard 1 L mobile phase bottles are about 230 mm tall with the cap on; check your tray clearance before you buy a case.
For GC, the bottle situation is simpler because you’re mostly storing standards and solvents rather than running mobile phase through a bottle. But the same rules apply: borosilicate for anything acidic or basic, PTFE-lined caps for anything volatile, and amber for anything light-sensitive. If you’re setting up a full GC workflow, the Agilent GC columns and accessories catalog is a good place to cross-reference what your instrument expects for inlet and detector consumables, and Thermo Fisher’s chromatography and sample handling pages cover the sample prep side.
For LC-MS work, the bottle matters more than most people think. Trace sodium and potassium from soda-lime glass will show up as adducts and as background in positive mode. Use borosilicate, rinse with LC-MS grade solvent before first use, and consider a PFA bottle for your calibrant solution. The Restek technical resources library has good application notes on mobile phase preparation that go deeper than I can here.
A decision checklist with real numbers
Here’s the checklist I use when specifying bottles for a new method or a new lab. It’s not exhaustive, but it catches the mistakes I see most often.
- Volume: buy 20 to 30% larger than your working volume. A 1 L bottle for 800 mL of mobile phase leaves enough headspace for degassing and for the inlet line without the filter sitting in the last 50 mL.
- Glass type: Type I borosilicate for pH < 6 or pH > 8, for trace metals work, and for any validated method. Type III soda-lime is acceptable for neutral buffers and general reagents.
- Thread: GPI 24-400 for 250 to 1000 mL, GPI 18-400 for 100 mL and below. Confirm the supplier’s thread standard in writing if you’re mixing vendors.
- Liner: PTFE-faced silicone for pierced applications, PTFE-faced rubber for volatile solvents, PE for aqueous short-term. Replace liners every 20 to 30 punctures, or sooner if you see tearing.
- Torque: 15 to 20 in-lb for GPI 24-400, 8 to 12 in-lb for GPI 18-400. Use a torque screwdriver.
- Temperature: borosilicate is rated to about 500 °C for short excursions, but continuous service above 150 °C will degrade most liners. Autoclave at 121 °C for 20 minutes with the cap loose.
- Light: amber for anything with an absorption band below 500 nm. Clear for mobile phase and general reagents.
- Graduation accuracy: ±5% is normal. Don’t rely on it for quantitative make-up.
- Autosampler clearance: measure your tray before ordering 1 L bottles. Standard height with cap is about 230 mm.
Comparison: bottle types by application
Here’s how I’d specify bottles across the four workflows I see most often. The numbers are what I actually use, not what the catalog says.
- HPLC mobile phase: 1 L Type I borosilicate, clear, GPI 24-400, two-port PTFE-faced silicone cap, 15 to 20 in-lb torque, replaced when the bottle shows etching or when the method changes.
- LC-MS calibrants and trace metals: 250 mL PFA, GPI 24-400 (or the fluoropolymer equivalent), PTFE-lined cap, 10 to 15 in-lb torque, dedicated to the application and never reused for anything else.
- GC standards and volatile solvents: 100 mL Type I borosilicate, amber, GPI 18-400, PTFE-faced rubber liner, 8 to 12 in-lb torque, stored in a flammable cabinet below 25 °C.
- General buffer prep: 500 mL Type III soda-lime, clear, GPI 24-400, PE or PTFE-faced silicone liner, 15 to 20 in-lb torque, replaced when the graduation marks become hard to read.
Operational precautions that save you grief
A few things I’ve learned the hard way, in no particular order.
Never store alkaline solutions in borosilicate long-term. Above pH 9, the glass slowly dissolves. A 0.1 M NaOH solution in a borosilicate bottle will show measurable sodium and silicate after a month. Use HDPE or PP for alkaline storage, and use borosilicate only for the working day.
Rinse new bottles before first use. Manufacturing residues and dust are real. Rinse three times with the solvent you’ll be storing, then once with the actual reagent. For trace metals work, do a 24-hour soak in 10% nitric acid followed by three rinses with 18 MΩ water.
Don’t over-torque PTFE liners. PTFE cold-flows. A liner torqued to 30 in-lb will deform and may extrude into the bottle neck. I’ve had to cut caps off bottles because of this. Stick to the torque range.
Replace liners on a schedule, not on failure. A PTFE-faced silicone liner is good for about 20 to 30 punctures before it starts leaking. If you’re piercing the same liner every day, replace it monthly. Keep a box of spare liners in the same drawer as the bottles.
Vent before you open. Volatile solvents build headspace pressure, especially in a warm lab. Loosen the cap a quarter turn and wait a second before fully removing it. This is basic, but I’ve seen people spray themselves with acetonitrile because they forgot.
Label with the date and the preparer’s initials. Not just the contents. A bottle of “0.1% TFA” with no date is a bottle of unknown age, and unknown age means unknown water content, unknown microbial growth, and unknown baseline. I use a permanent marker on the bottle shoulder and a piece of lab tape on the cap. Replace the label when you refill.
Inspect for cracks at the neck. The neck is the stress concentration point. A hairline crack there will fail under torque or under vacuum. Hold the bottle up to a light and look at the neck every time you wash it. Retire any bottle with a visible crack, no exceptions.
Troubleshooting checklist
When something’s wrong and you suspect the bottle, work through this list in order. It’s roughly ordered by how often each item is the actual culprit.
- Baseline drift or rising noise: check the liner for a leak, check the inlet filter for partial clogging, check the bottle for etching. A pitted bottle interior will shed particles into the mobile phase.
- Unexpected peaks at the solvent front: suspect plasticizer or oligomer leaching from an HDPE bottle or a PE liner. Swap to borosilicate and a PTFE-faced liner.
- Sodium or potassium adducts in LC-MS: suspect soda-lime glass. Switch to borosilicate or PFA and re-rinse.
- Retention time drift between batches: suspect evaporation through a poorly sealed cap, or inaccurate make-up using bottle graduations. Check torque and weigh your components.
- Visible haze or particles in the bottle: suspect glass etching from alkaline storage, or microbial growth in an aqueous buffer. Retire the bottle and remake the solution.
- Cap won’t seal: check the thread standard (GPI vs DIN), check the liner for cold flow, check the torque. If all three are correct, the bottle neck may be out of round; retire it.
- Liner tears on puncture: the needle or inlet line is dull or misaligned. Replace the liner and check the alignment before the next run.
Where to buy, and what to ask
For standard borosilicate bottles and caps, the major lab supply distributors all carry equivalent products and the differences come down to lead time and price. For specialty items (PFA bottles, two-port caps, custom liner materials), you’ll often do better with a specialist. Our own reagent bottle catalog covers the borosilicate and fluoropolymer range, and if you’re building out a full sample-handling workflow, the sample vial selection matters just as much as the bottle. The chromatography products side of our network is where I’d start if you’re specifying a whole method from scratch.
Three questions to ask any supplier before you commit to a case quantity. First, what’s the glass type and the hydrolytic resistance class, in writing? Second, what’s the GPI or DIN thread standard, and is it consistent across the sizes you’re buying? Third, what’s the liner material and the recommended torque? If a supplier can’t answer all three, they’re a reseller, not a manufacturer, and you should expect variability between lots.
One more thing: buy in case quantities for anything you use regularly, but buy singles of anything new. I’ve made the mistake of ordering 48 bottles of a “close enough” size and then discovering the cap didn’t clear the autosampler tray. A single bottle costs a few dollars. A case of the wrong bottle costs a few hundred and a shelf full of clutter.
Takeaway
The right reagent bottle is the one that matches your chemistry, your closure requirements, and your instrument’s physical constraints, in that order. Borosilicate with a PTFE-faced liner and a GPI 24-400 cap covers most HPLC and general lab work. PFA covers trace metals and aggressive chemistries. Amber covers photosensitive analytes. Torque to 15 to 20 in-lb, replace liners every 20 to 30 punctures, rinse before first use, and don’t trust the graduation marks for quantitative work. Get those four things right and the bottle stops being a variable in your method, which is the only thing you should ever ask of a piece of lab glass.
References & further reading
Related resources from our lab consumables network:
- Reagent Bottle at reagentbottleforsale.com
- Hplc Autosampler Vial at hplcautosamplervials.com
- Sample Vial at samplevialprice.com
- Chromatography Products at chromatographyselling.com
External references and standards: