

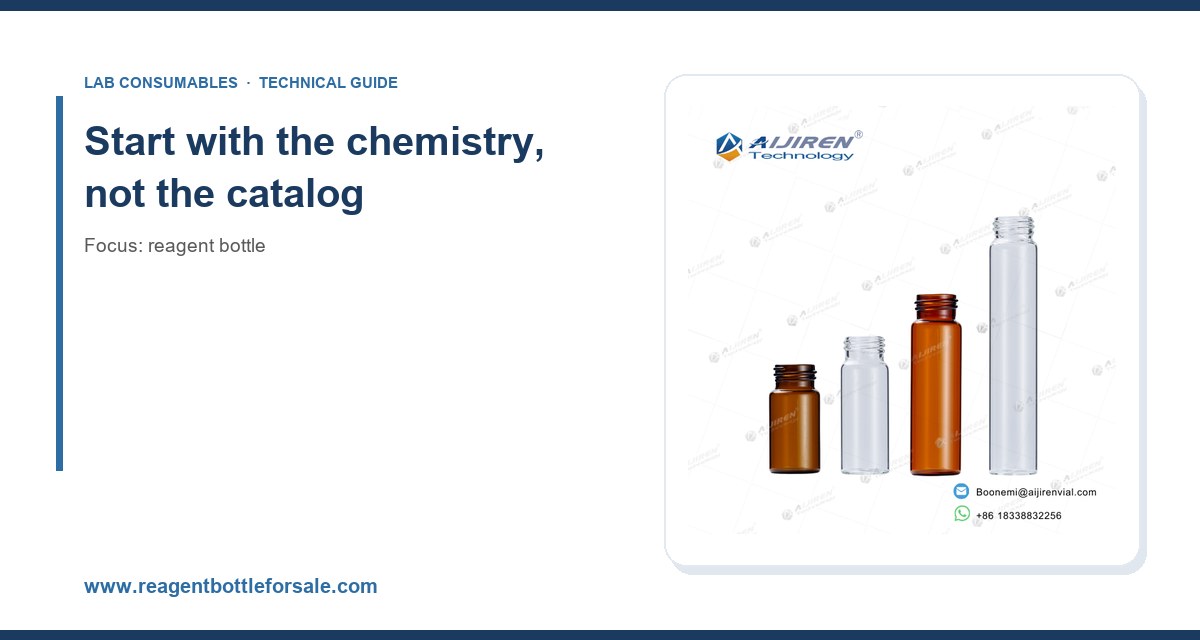
I have watched a postdoc spend twenty minutes hunting for a cap that would fit a 2 L amber bottle, only to discover the thread was a DIN 45 and not the GPI 38-400 the shelf label implied. That is a small failure with an outsized cost: a stalled prep run, a wasted afternoon, and a batch of light-sensitive standards sitting open to the air. After fifteen years buying and stocking reagent bottles, I treat the bottle as a system, not a container. The glass, the closure, the liner, the pour ring, and the graduations all have to agree with the chemistry and with the person holding it at 7 a.m. This guide is the checklist I wish someone had handed me on day one.
Before you open a supplier page, write down the solvent, the concentration, the temperature, and the light exposure. Those four facts eliminate most of the catalog. A bottle that fails on any one of them is not a bargain, it is a future incident report.
Glass type selection
Most reagent bottles in a working lab are one of three glasses. Know which one you are holding.
- Borosilicate 3.3 (Type I): low alkali release, good thermal shock resistance (roughly 160 °C differential for thin-walled ware), suitable for aqueous and most organic reagents, and the default for anything that will be autoclaved or heated. Coefficient of expansion around 3.3 × 10⁻⁶ /K. If you are storing HPLC-grade solvents or preparing mobile phase, this is the glass you want.
- Soda-lime (Type III): cheaper, adequate for short-term storage of neutral aqueous solutions, but it leaches alkali into the contents over time. Do not use it for pH-sensitive work, trace metal analysis, or anything held longer than a few weeks. The surface can shed flakes after repeated washing.
- Amber borosilicate: same base glass with iron oxide added for light protection. It blocks most of the UV below about 500 nm, which matters for vitamin standards, silver nitrate, iodine, and many photodegradable dyes. Amber is not a substitute for foil wrapping when you are working below 400 nm.
For trace-metal work, I default to PTFE or PFA bottles regardless of glass quality. Borosilicate still releases sodium and boron at the low-ppb level, and if you are running ICP-MS at 1 ppb detection, that background matters. For high-purity solvents feeding an HPLC, the glass is fine but the closure liner is often the contamination source. More on that below.
When plastic is the right answer
Plastic wins in three situations: fluoride-containing reagents (HF attacks glass), strong alkali (NaOH above 1 M will etch soda-lime and slowly attack borosilicate), and anything that will be squeezed, dropped, or shipped. HDPE and PP are the workhorses. LDPE is more flexible and better for squeeze bottles. PMP (polymethylpentene) is transparent and autoclavable, which makes it popular for cell culture media. The trade-off is that all plastics are slightly permeable to oxygen and solvent vapor, and the more volatile the solvent, the faster the concentration drifts.
I keep a simple rule: if the reagent will sit on a shelf for more than a month and the concentration has to be exact, use glass. If it will be used within a week and the container will be handled roughly, plastic is fine.
The closure is where most failures happen
I have replaced more caps than bottles. The thread standard, the liner material, and the torque you apply determine whether the bottle stays sealed through a temperature swing, a shipping cycle, or a year on the shelf.
Thread standards you will actually encounter
Two thread families dominate: GPI (Glass Packaging Institute) and DIN (Deutsches Institut für Normung). They do not interchange. A GPI 38-400 cap will not seal a DIN 38 bottle, even though both are nominally 38 mm. The GPI number is the diameter in millimeters followed by the thread finish code; the DIN number refers to the neck diameter with a different thread pitch. If you are standardizing a lab, pick one family and stay with it. Mixing them is how you end up with a drawer full of caps that fit nothing.
Common sizes and what they are for:
- GPI 18-400: small diagnostic and sample bottles, 4 to 30 mL. Often paired with a cone liner.
- GPI 24-400: 60 mL and 125 mL bottles, the most common general-purpose size in a working lab.
- GPI 38-400: 250 mL to 1 L, the standard for solvent and mobile-phase bottles. This is the one that feeds most HPLC systems.
- GPI 45-400: 2 L to 4 L, larger carboys and bulk solvent.
- DIN 45, DIN 51: common on European-sourced bottles and on many media and buffer bottles. Verify before you order caps in bulk.
If you are sourcing bottles for an autosampler or a fraction collector, the same thread logic applies to the small vials. A 12 × 32 mm HPLC autosampler vial with a crimp or screw cap is a different animal from a 4 mL reagent bottle, but the closure compatibility rules are identical.
Liner selection by chemical class
The liner is the disk inside the cap that actually touches the reagent. Get this wrong and you get extractables, swelling, or a slow leak you will not notice until the level drops.
- PTFE-faced silicone: the general-purpose choice. PTFE faces the reagent (inert to almost everything), silicone provides the seal. Good from about -40 °C to 200 °C for short excursions. Not for long-term storage of chlorinated solvents at elevated temperature.
- PTFE-faced EPDM: better compression set, preferred for aqueous buffers and for repeated open-and-close cycles. Do not use with aromatic or chlorinated solvents.
- Solid PTFE: maximum chemical resistance, but it cold-flows and will not seal reliably on a rough neck. Use it for the most aggressive reagents and expect to re-torque.
- Polyethylene or polypropylene: cheap, fine for powders and short-term aqueous storage. Not for solvents.
- Aluminum foil: for single-use or shipping. Not a reusable seal.
I have seen a lab store dichloromethane in a bottle with a natural rubber liner. Two weeks later the liner was a sticky mess and the cap had bonded to the neck. That is a chemistry problem disguised as a hardware problem.
Torque and leak testing
Hand-tight is the right answer for most reagent bottles, but “hand-tight” is not a specification. For a GPI 38-400 cap with a PTFE-faced silicone liner, I aim for 1.5 to 2.5 N·m on a calibrated torque wrench. Below 1.0 N·m you risk vapor loss; above 3.0 N·m you deform the liner and shorten its life. For small 24-400 caps, 0.6 to 1.0 N·m is the working range. If you ship bottles, run a leak test: fill with water, cap at the target torque, invert for 24 hours at 40 °C, and weigh before and after. A loss above 0.1 g is a fail.
For anything going into a regulated environment, document the torque value and the liner lot. When a stability study fails, the first question is always whether the closure was the variable.
Graduations, pour rings, and the parts people forget
Graduations on a reagent bottle are approximate, not analytical. A 1 L bottle marked in 100 mL increments is typically accurate to about ±5% of full scale, which is fine for making up a rinse solution and useless for a quantitative transfer. If you need better, use a graduated cylinder and stop expecting the bottle to do the job.
The pour ring (also called a drip ring or anti-drip collar) is the most underrated accessory in the catalog. It sits at the neck and catches the drop that runs down the thread, keeping the cap and the bench clean. For viscous reagents, oils, and anything that stains, it is worth the extra cost. I specify them on every bottle above 500 mL in our own stock.
Other details that separate a good bottle from an annoying one:
- Wall thickness: 1.5 to 2.0 mm on a 500 mL borosilicate bottle is typical. Thinner walls are lighter but more fragile; thicker walls cost more and slow thermal equilibration.
- Neck finish quality: a chipped or out-of-round neck will leak no matter what cap you use. Inspect a sample before you buy a case.
- Base flatness: a wobbling bottle on a stir plate is a spill waiting to happen. Check that it sits flat.
- Marking area: a frosted patch or a writable label zone saves you from tape residue and lost labels.
Matching the bottle to the workflow
The right bottle for a QC bench is not the right bottle for a synthesis lab or a shipping dock. Here is how I break it down.
HPLC mobile phase and solvent reservoirs
This is the most demanding everyday application. The bottle feeds a pump, sits under vacuum or positive pressure, and is often degassed. Use a 1 L or 2 L borosilicate bottle with a GPI 38-400 neck, a PTFE-faced silicone liner, and a solvent inlet cap with a 1/8 in. or 1/16 in. tubing port. The cap needs a vent, either a filtered vent or a small hole with a PTFE filter, or the pump will pull a vacuum and starve. Amber glass if the mobile phase contains light-sensitive additives. Keep a spare cap on the shelf; the inlet port is the first thing to wear out.
If you are running a full chromatography workflow, the bottle is one part of a chain that includes columns, fittings, and detectors. The consumables side of that chain is well covered at chromatography products, and the major vendors publish compatibility data worth reading before you standardize: Agilent chromatography consumables and columns and Thermo Fisher chromatography and sample handling both document the solvent and temperature limits you will run into.
Standards, reference materials, and small-volume work
For calibration standards and small volumes, the bottle shrinks and the closure gets more critical. A 100 mL amber borosilicate bottle with a PTFE-lined screw cap is the standard. If you are preparing a series of standards for an autosampler, you will likely transfer to a sample vial at the end, and the transfer step is where you lose volume and introduce error. Keep the bottle and the vial from the same supplier family so the caps and septa are consistent.
Bulk solvent and waste
For 4 L and larger, safety features matter more than graduations. Look for a carry handle, a vented cap, and a secondary containment tray. For waste collection, use HDPE or PP with a color-coded cap and a label that states the hazard class and the fill date. Never fill above 80% to leave headspace for vapor expansion. If the waste is going to a regulated disposal stream, the labeling requirements follow your local rules; in the U.S., the EPA’s SW-846 test methods for waste and materials are the reference for the analytical side of that documentation.
Cold storage and freeze-thaw
Below about -20 °C, borosilicate is fine but the liner is the weak point. Silicone stiffens and loses compression set; PTFE-faced liners can crack if the cap is over-torqued. For freezer storage, use a PTFE-faced silicone liner torqued to the low end (around 1.0 N·m), leave 10 to 15% headspace, and let the bottle equilibrate before opening. For repeated freeze-thaw, plastic (PP or PMP) with a screw cap is often more forgiving than glass.
Autoclave and hot work
Borosilicate 3.3 handles autoclave cycles at 121 °C, 15 psi, 20 minutes without trouble, provided the cap is vented or loosened. Never autoclave a sealed bottle; the pressure differential will either crack the glass or blow the cap. Loosen the cap a quarter turn, or use a vented closure. Soda-lime bottles will survive a few cycles but will craze over time.
A decision checklist with numbers
Use this as a quick screen before you place an order. If a candidate bottle fails any line, move on.
- Capacity: 60% to 80% of the working volume. A 1 L bottle should hold 600 to 800 mL, not 950 mL.
- Glass type: Type I borosilicate for solvents, standards, and heat; Type III only for short-term neutral aqueous.
- Light protection: amber if the reagent absorbs below 500 nm or degrades on the bench.
- Thread: GPI or DIN, matched to your existing cap inventory. Do not mix.
- Liner: PTFE-faced silicone for general use; EPDM for aqueous; solid PTFE for aggressive reagents.
- Torque: 1.5 to 2.5 N·m for 38-400; 0.6 to 1.0 N·m for 24-400.
- Temperature: confirm the rating covers your autoclave, freezer, or oven cycle.
- Pour ring: yes for anything above 500 mL or any viscous reagent.
- Graduation accuracy: assume ±5% of full scale; do not use for quantitative transfer.
- Leak test: 24 hours inverted at 40 °C, loss under 0.1 g.
Operational precautions that save bottles and batches
Most bottle failures I have seen were not manufacturing defects. They were handling mistakes that a five-minute briefing would have prevented.
- Never store strong alkali in glass long-term. NaOH above 1 M will etch the neck and freeze the cap. Use HDPE.
- Never store HF in glass. It dissolves the silica. Use PTFE or HDPE, and label it loudly.
- Do not over-torque to stop a leak. If it leaks at 2.5 N·m, the liner or the neck is bad. Replace one of them.
- Do not reuse a bottle for a different reagent without a full wash and a liner change. Cross-contamination from a previous solvent is a common source of ghost peaks in HPLC.
- Inspect necks before every fill. A chip of 0.5 mm is enough to break the seal.
- Keep caps matched to bottles. A dedicated cap per bottle, labeled, prevents the thread mismatch problem entirely.
If you are standardizing a lab, buy bottles and caps as a matched set from one supplier. The reagent bottle range we stock is organized by thread family and glass type for exactly this reason: it removes the guesswork at the shelf. For method development and validation work, the technical notes at Restek technical resources for chromatography are a good cross-check on solvent compatibility and liner selection.
Troubleshooting checklist
When a bottle misbehaves, work through this list in order. In my experience, the answer is in the first four lines about 80% of the time.
- Leak at the cap: check the liner first (swollen, cracked, or missing), then the neck for chips or out-of-round, then the torque. Replace the liner before the cap.
- Cap will not turn: seized thread from dried reagent or alkali attack. Soak in warm water with a mild detergent, use a strap wrench, and replace the bottle if the neck is etched.
- Contents discolored or cloudy: light exposure (switch to amber), liner extractables (switch to PTFE-faced), or glass leaching (switch to Type I or plastic).
- Level drops over time: vapor loss through a bad seal or a permeable plastic wall. Check torque, then consider glass.
- Ghost peaks in HPLC: contaminated bottle or liner. Replace both and re-run the blank.
- Cracked bottle after autoclave: cap was sealed, or the glass was soda-lime, or the cooling was too fast. Vent the cap and cool slowly.
- Bottle wobbles on the stir plate: warped base from heat or a manufacturing defect. Reject it.
What I recommend
For a general-purpose analytical lab, standardize on borosilicate 3.3, amber where light matters, GPI 38-400 necks for 250 mL to 1 L, and PTFE-faced silicone liners torqued to 1.5 to 2.5 N·m. Keep a small stock of solid PTFE liners for aggressive reagents and a set of EPDM liners for aqueous buffers. Add pour rings to every bottle above 500 mL. For trace-metal work, keep a separate set of PFA or PTFE bottles and never let them touch the glass wash. For HPLC mobile phase, use a dedicated solvent inlet cap with a filtered vent, and replace the cap every six months whether it looks worn or not.
That combination covers roughly 90% of what a working lab actually does, and it eliminates the two failure modes I see most: thread mismatch and liner incompatibility. The remaining 10% is specialty work (HF, strong alkali, cryogenic storage), and those cases deserve a conversation with the supplier rather than a guess from a catalog page.
The bottle is the first thing your reagent touches and the last thing between your sample and the environment. Get the glass, the thread, the liner, and the torque right, and the rest of the workflow gets quieter. Get them wrong, and you will spend your morning hunting for a cap that fits.
References & further reading
Related resources from our lab consumables network:
- Reagent Bottle at reagentbottleforsale.com
- Hplc Autosampler Vial at hplcautosamplervials.com
- Sample Vial at samplevialprice.com
- Chromatography Products at chromatographyselling.com
External references and standards: